Smart Home Hacks: Integrating Zigbee Sensors with Python Scripts
1. Introduction: The Entropy of the Walled Garden
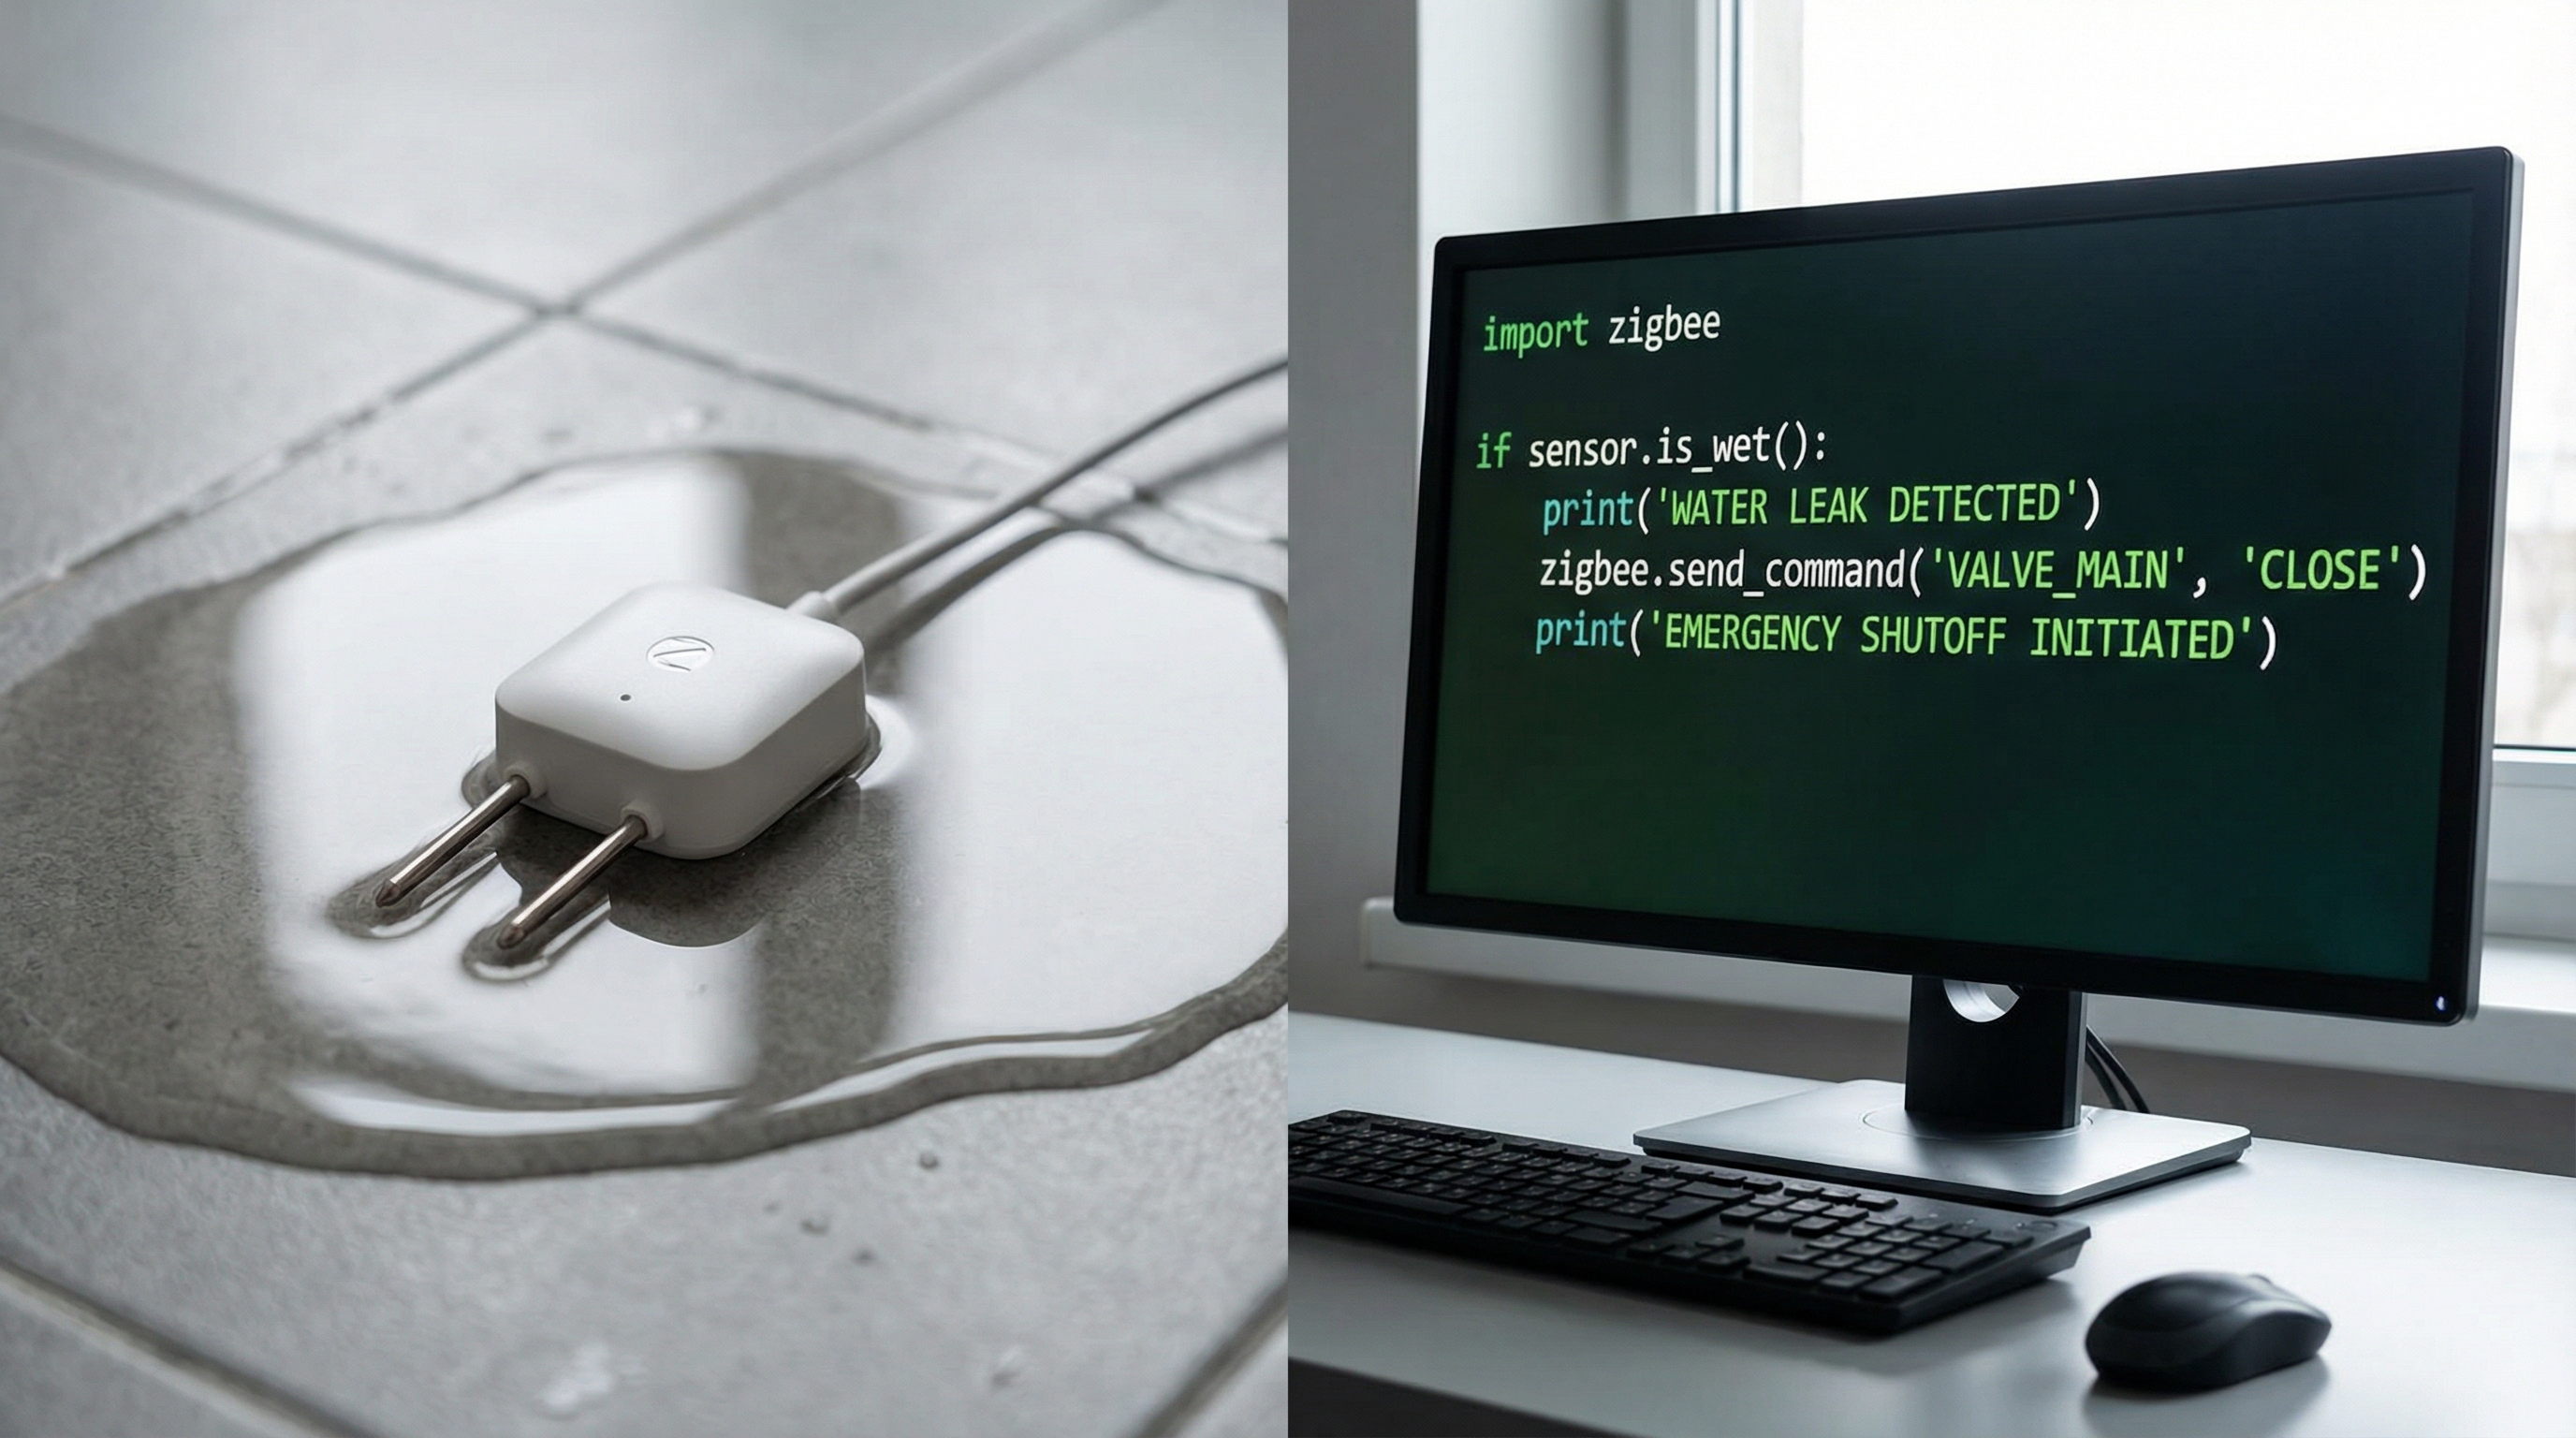
Imagine this scenario: It is 3:00 AM. In the utility room of your residence, a copper pipe fitting, subjected to years of thermal expansion and contraction cycles, finally yields. A fine mist of water begins to spray onto the drywall and pool near the sump pump. You have a "smart" water leak sensor installed. However, this sensor belongs to a proprietary ecosystem. To alert you, the signal must travel from the sensor to a proprietary hub, traverse your local gateway, negotiate a TLS handshake with a cloud server located in a data center three states away, process the logic, and send a push notification back to your phone.
In that 500-millisecond to 3-second round-trip time—assuming your internet connection is stable and the vendor's API is operational—entropy increases. Water damages organic materials. But as physicists and engineers, we know that latency is not just an annoyance; in control systems, it is a destabilizing force. The reliance on cloud computing for local, critical state-changes is fundamentally flawed architecture. It introduces external dependencies and variable latency into a system that demands determinism.
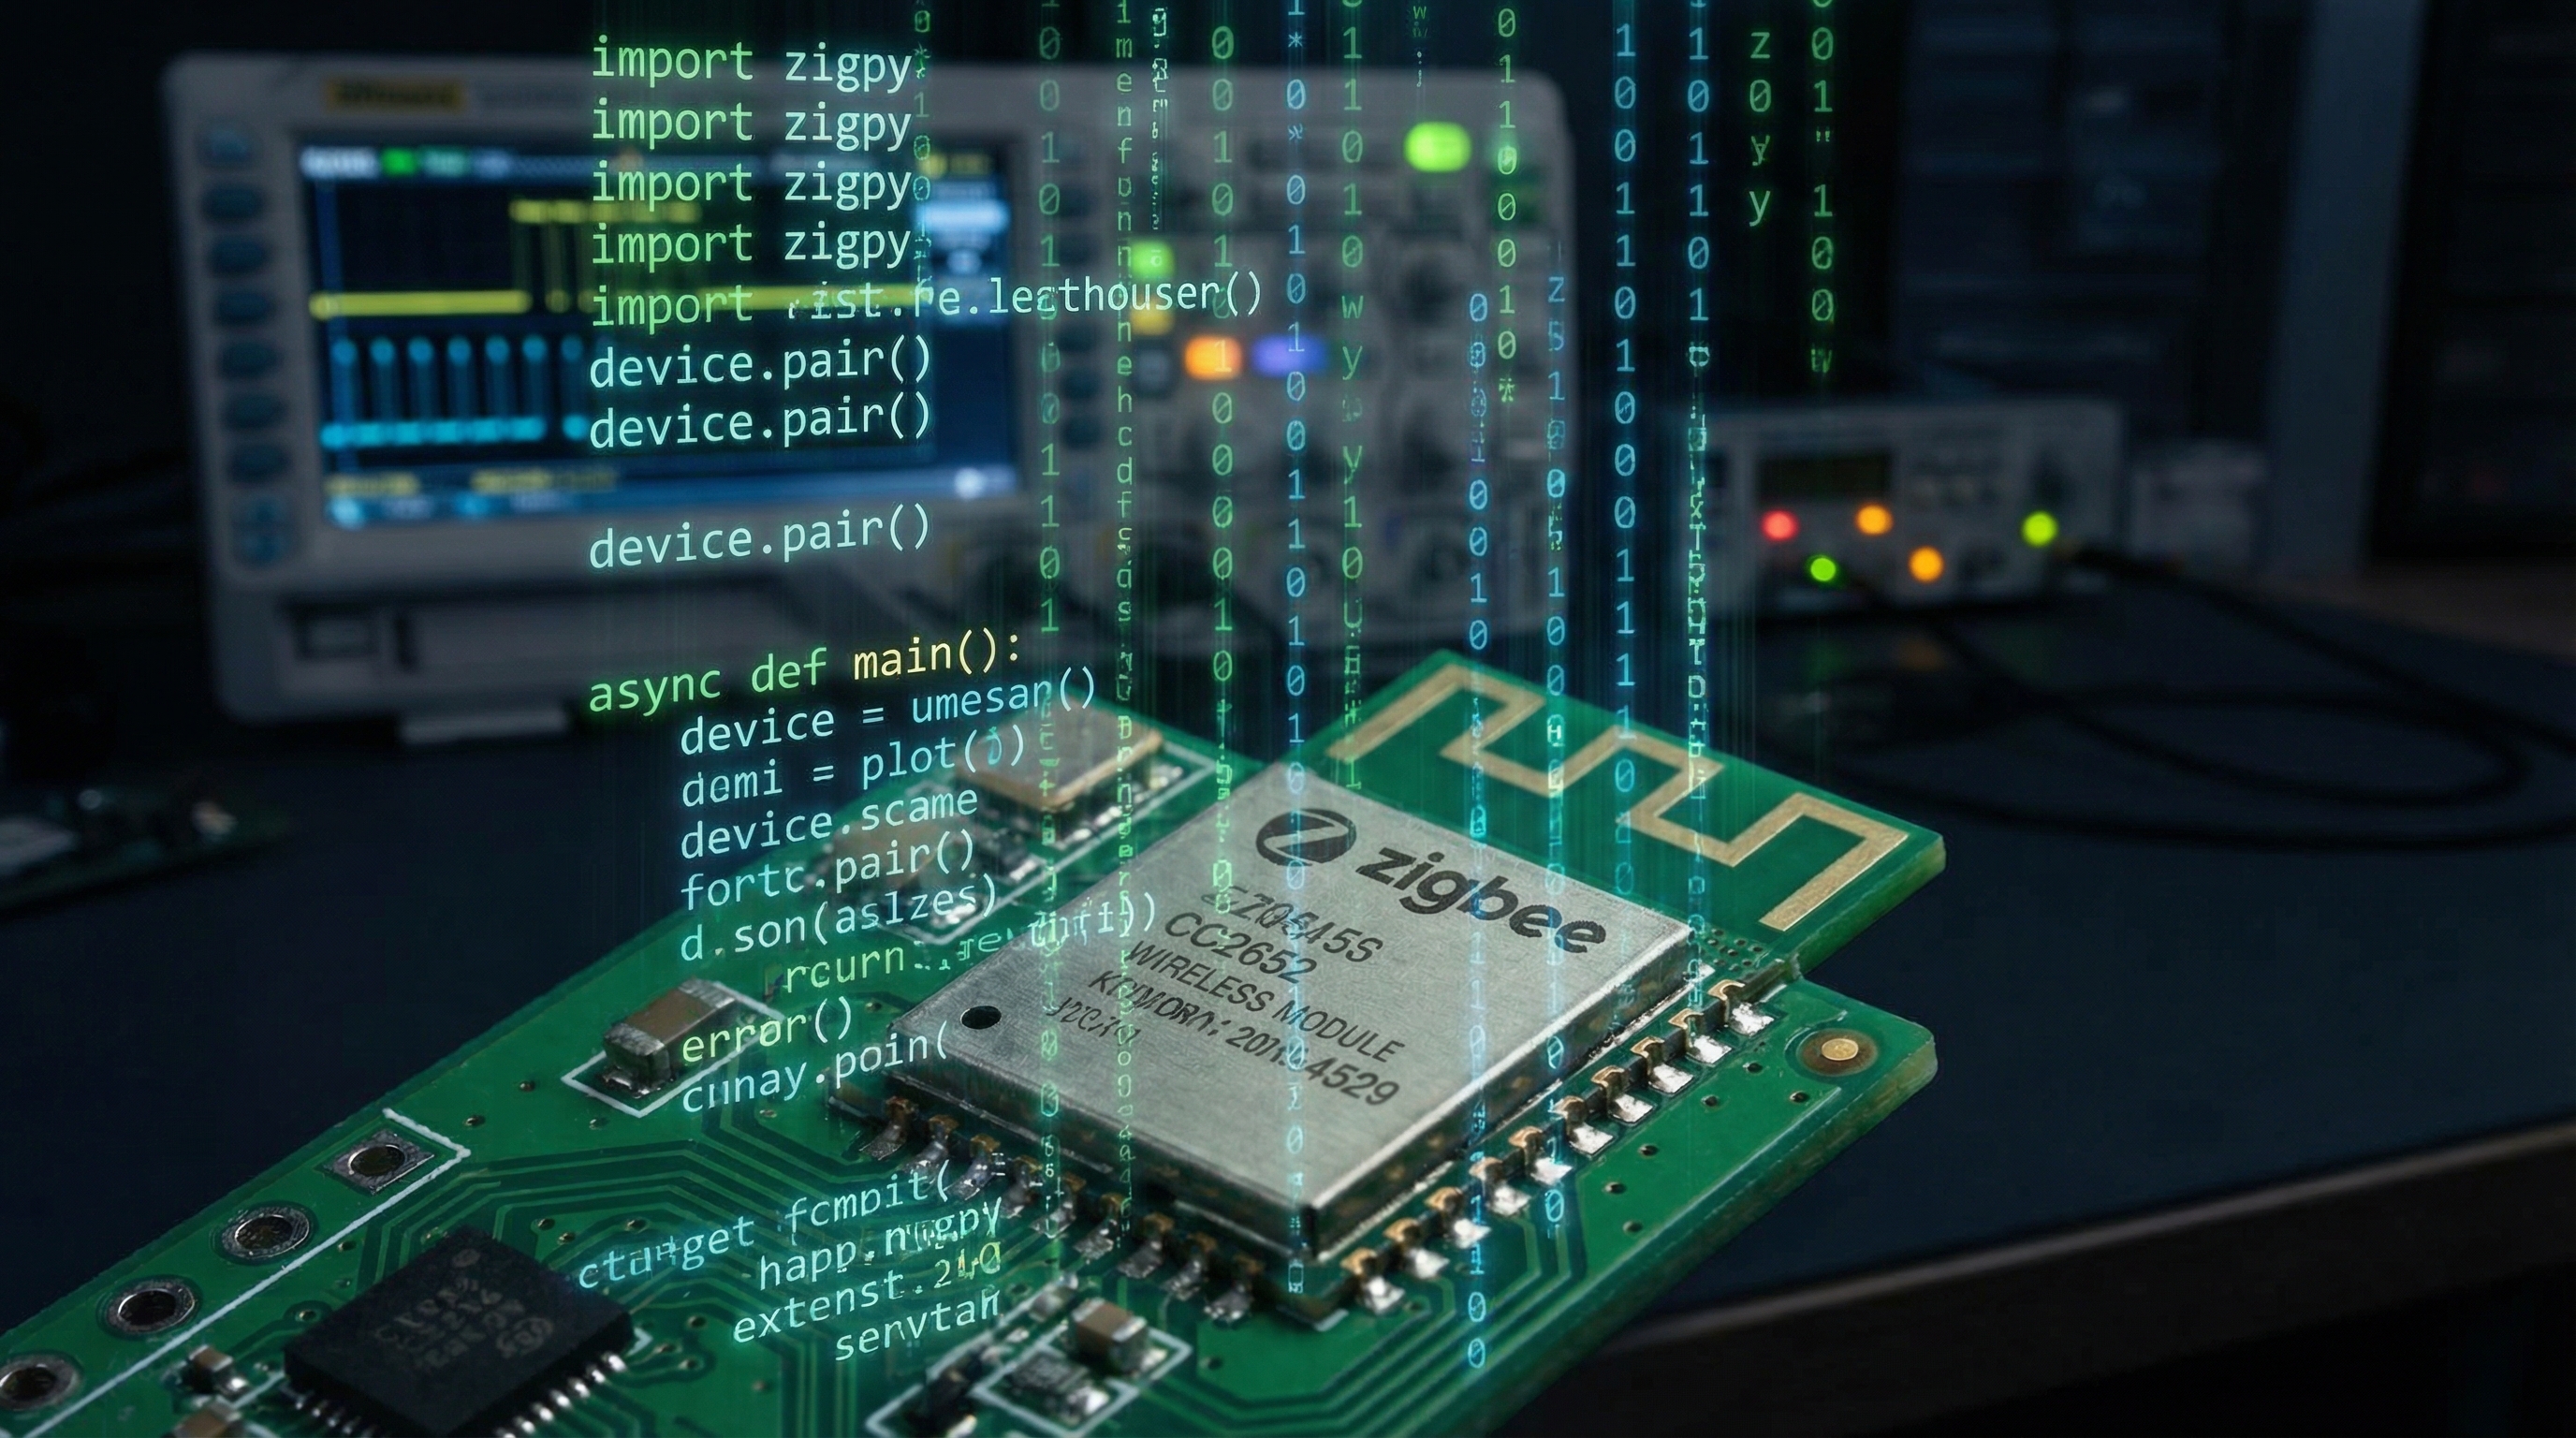
This post is not about installing a consumer app. It is about reclaiming control over your physical environment. We will explore how to interface directly with the IEEE 802.15.4 protocol (Zigbee) using Python. By decoupling the physical layer from the logic layer using MQTT (Message Queuing Telemetry Transport) and Python, we achieve a system that operates at the speed of local RF propagation, governed by your own algorithms, totally independent of internet connectivity. We will move from being passive users of "smart" devices to active engineers of a responsive, deterministic environment.
2. Theoretical Foundation: The Physics of IEEE 802.15.4 and Mesh Topology
To effectively script for Zigbee, one must understand the underlying physics of the transport layer. Zigbee operates on top of the IEEE 802.15.4 standard, typically in the 2.4 GHz ISM band (though sub-1 GHz variants exist). Unlike Wi-Fi, which utilizes a star topology designed for high bandwidth (throughput), Zigbee utilizes a mesh topology designed for low power and low latency.
Signal Propagation and Link Quality
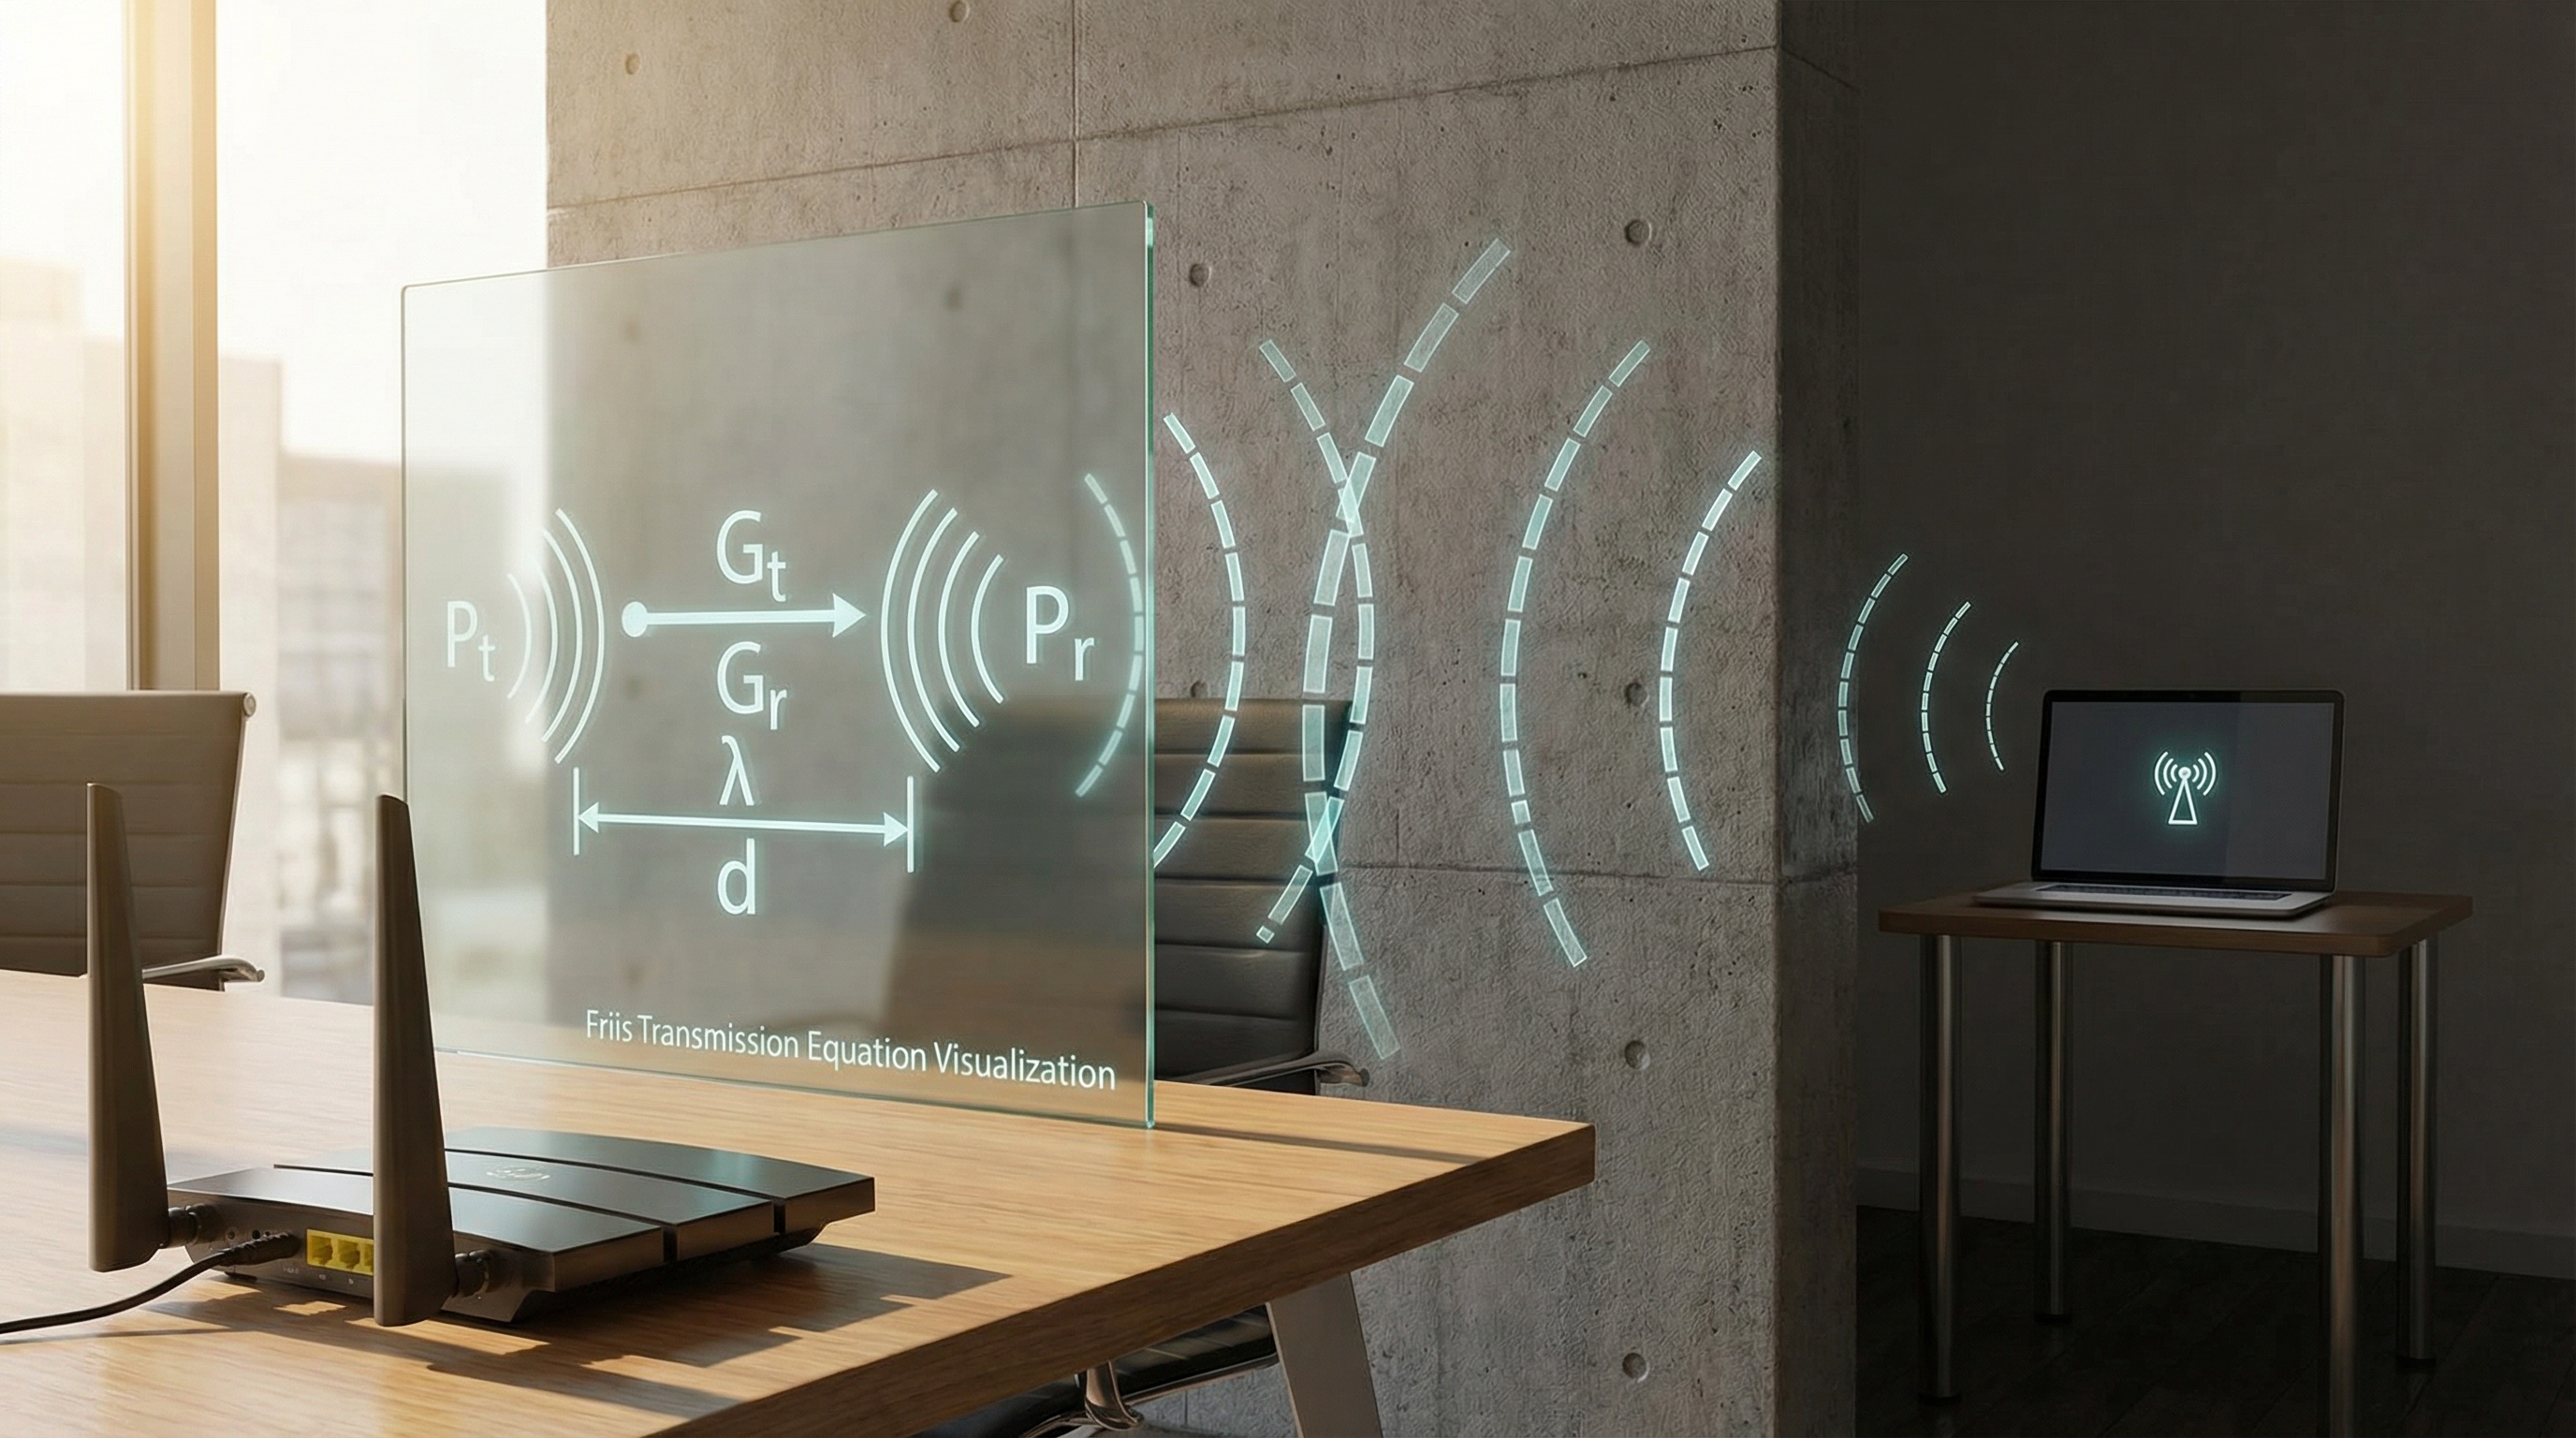
The robustness of your sensor network relies on the Link Quality Indicator (LQI) and the Received Signal Strength Indicator (RSSI). The relationship between transmitted power and received power is governed by the Friis Transmission Equation:
Where:
- (P_r) is received power (dBm)
- (P_t) is transmitted power (dBm)
- (G_t, G_r) are antenna gains
- (d) is the distance
- (\lambda) is the wavelength
Understanding this is crucial when placing your coordinator (the USB stick acting as the root node). In a mesh network, routers (mains-powered devices like bulbs) repeat signals, effectively reducing (d) between hops. However, every hop introduces processing delay (latency). When writing Python scripts for automation, we must treat the network as a graph (G = (V, E)), where (V) are devices and (E) are the RF links. The shortest path isn't always the most reliable; we prioritize LQI over hop count.
The Coordinator and End-Points
In Zigbee, data is structured in Clusters and Attributes. A temperature sensor (End Device) sleeps 99% of the time to conserve battery (Deep Sleep currents often < 1µA). It wakes only to transmit a payload when a threshold is breached or a reporting interval expires. This asynchronous behavior dictates our software architecture. We cannot "poll" a sleeping battery device; we must implement an event-driven architecture.
Our bridge between this RF physics and Python logic is Zigbee2MQTT. It translates the binary Zigbee Cluster Library (ZCL) packets into human-readable JSON payloads sent over MQTT. This transformation allows us to apply high-level software engineering patterns to low-level hardware interrupts.
3. Implementation Deep Dive: The Python-MQTT Bridge
We will construct a Python service that acts as the "brain." This script will subscribe to MQTT topics published by Zigbee2MQTT, parse the JSON payloads, apply hysteresis (to prevent signal flapping), and execute actions.
Prerequisites:
- A Zigbee Coordinator (e.g., Sonoff Zigbee 3.0 Dongle Plus based on TI CC2652P)
- Zigbee2MQTT running (Docker or bare metal)
- MQTT Broker (Mosquitto)
- Python 3.9+
Code Example 1: The Asynchronous Listener
Standard synchronous MQTT clients can block the main thread. For a high-performance home, we use asyncio combined with paho-mqtt (using a wrapper or the v2 client) to handle multiple sensor streams concurrently.
import asyncio
import json
import logging
import paho.mqtt.client as mqtt
from typing import Dict, Any

# Configuration
MQTT_BROKER = "192.168.1.10"
MQTT_PORT = 1883
BASE_TOPIC = "zigbee2mqtt/+"

# Setup Logging
logging.basicConfig(level=logging.INFO, format='%(asctime)s - %(levelname)s - %(message)s')
logger = logging.getLogger(__name__)

class SmartHomeController:
    def __init__(self):
        self.client = mqtt.Client(mqtt.CallbackAPIVersion.VERSION2)
        self.client.on_connect = self.on_connect
        self.client.on_message = self.on_message
        self.sensor_state: Dict[str, Any] = {}

    def on_connect(self, client, userdata, flags, rc, properties=None):
        if rc == 0:
            logger.info("Connected to MQTT Broker")
            client.subscribe(BASE_TOPIC)
        else:
            logger.error(f"Failed to connect. Return code: {rc}")

    def on_message(self, client, userdata, msg):
        try:
            # Extract device name from topic: zigbee2mqtt/device_name
            device_name = msg.topic.split("/")[1]
            payload = json.loads(msg.payload.decode())

            # Offload processing to avoid blocking the network loop
            asyncio.run_coroutine_threadsafe(self.process_sensor_data(device_name, payload), loop)

        except json.JSONDecodeError:
            logger.error(f"Malformed JSON from {msg.topic}")
        except Exception as e:
            logger.error(f"Error processing message: {e}")

    async def process_sensor_data(self, device, data):
        # This is where the physics meets the code
        logger.debug(f"Processing {device}: {data}")

        # Example: Link Quality check
        if 'linkquality' in data and data['linkquality'] < 50:
            logger.warning(f"Weak signal on {device} (LQI: {data['linkquality']})")

        # Update internal state cache
        self.sensor_state[device] = data

        # Trigger automation logic
        await self.evaluate_automations(device, data)

    async def evaluate_automations(self, device, data):
        # Placeholder for logic engine
        pass

    def start(self):
        self.client.connect(MQTT_BROKER, MQTT_PORT, 60)
        self.client.loop_start()
Global event loop for asyncio integration
loop = asyncio.new_event_loop() asyncio.set_event_loop(loop)
if name == "main": controller = SmartHomeController() controller.start() try: loop.run_forever() except KeyboardInterrupt: loop.close()
### Code Example 2: Implementing Hysteresis and Debouncing

In applied physics, signals are rarely clean. A door contact sensor might bounce (rapidly switch open/closed) due to mechanical vibrations, or a temperature sensor might fluctuate around a setpoint due to thermal noise. Implementing a software-based Schmidt Trigger or hysteresis loop is essential.

```python
    # Inside SmartHomeController class...

    async def check_temperature_threshold(self, device, current_temp, setpoint=22.0, hysteresis=0.5):
        """
        Implements a heating controller with hysteresis to prevent short-cycling.
        Physics: Thermal inertia prevents instant changes, but sensor noise exists.
        """
        previous_state = self.sensor_state.get(device, {}).get('heater_active', False)

        if current_temp < (setpoint - hysteresis) and not previous_state:
            await self.trigger_heater(True)
            logger.info(f"Temp {current_temp} < {setpoint - hysteresis}. Heater ON.")
            return True

        elif current_temp > (setpoint + hysteresis) and previous_state:
            await self.trigger_heater(False)
            logger.info(f"Temp {current_temp} > {setpoint + hysteresis}. Heater OFF.")
            return False

        return previous_state

    async def trigger_heater(self, state: bool):
        # Send MQTT command to a Zigbee smart plug
        topic = "zigbee2mqtt/heater_plug/set"
        payload = json.dumps({"state": "ON" if state else "OFF"})
        self.client.publish(topic, payload)
Code Example 3: Multi-Sensor Fusion (Bayesian Approach Simplified)
Single sensors are prone to false positives. By aggregating data (Sensor Fusion), we increase reliability. For example, verifying occupancy using both a PIR motion sensor and energy consumption data from a smart plug.
    async def determine_occupancy(self):
        # Get latest states
        motion = self.sensor_state.get('living_room_pir', {}).get('occupancy', False)
        tv_power = self.sensor_state.get('tv_plug', {}).get('power', 0)

        # Threshold for TV power consumption in Watts
        TV_ON_THRESHOLD = 30.0

        # Logic: If Motion is detected OR TV is drawing significant power, room is occupied.
        # This handles the "sitting still watching a movie" edge case where PIR fails.
        is_occupied = motion or (tv_power > TV_ON_THRESHOLD)

        if is_occupied != self.sensor_state.get('room_occupancy', False):
            logger.info(f"Occupancy State Changed: {is_occupied}")
            self.sensor_state['room_occupancy'] = is_occupied

            # Execute lighting scene
            payload = {"brightness": 254 if is_occupied else 0}
            self.client.publish("zigbee2mqtt/living_room_lights/set", json.dumps(payload))
4. Advanced Techniques & Optimization
Once the basic loop is functioning, we must look at system stability and data integrity from an engineering perspective.
The Heartbeat & Availability Problem
Zigbee devices, particularly battery-powered ones, can drop off the mesh silently. If a leak sensor runs out of battery, it sends no "I'm dead" signal; it simply ceases to exist.
We must implement a Time-To-Live (TTL) monitor. Zigbee2MQTT provides a last_seen attribute (epoch timestamp).
Optimization Strategy:
Create a background async task that runs every minute, iterating through self.sensor_state. If current_time - last_seen > threshold, flag the device as offline. The threshold depends on the device type (e.g., 1 hour for mains-powered, 25 hours for battery-powered reporting daily).
Preventing the "Thundering Herd"
If power is restored after an outage, all Zigbee devices might attempt to rejoin the coordinator simultaneously, causing RF collisions and packet loss (CSMA/CA backoff algorithms can only do so much).
Best Practice: In your Python script, implement a "warm-up" period. Upon startup, ignore triggers for the first 30 seconds to allow the mesh to stabilize and the MQTT broker to clear retained messages. This prevents ghost triggers where old "motion detected" retained messages cause lights to flash immediately upon reboot.
Data Persistence for Analysis
While Python handles the logic, it shouldn't store the history in RAM. Integrate InfluxDB. Python's influxdb-client allows you to push sensor data (temperature, humidity, LQI) into a time-series database. This allows you to visualize thermal gradients in your home using Grafana, helping you diagnose insulation gaps—a direct application of thermodynamics using smart home tech.
5. Real-World Applications
1. HVAC PID Control
Most residential thermostats use simple bang-bang control (On/Off). By placing Zigbee temperature sensors in every room and using Python to calculate a weighted average based on occupancy, you can control the HVAC relay using a PID (Proportional-Integral-Derivative) algorithm. This minimizes overshoot and stabilizes ambient temperature, improving energy efficiency.
2. Hydroponics and Environmental Stability
For indoor botany, Vapor Pressure Deficit (VPD) is more critical than relative humidity. A Python script can take temperature and humidity inputs from a Zigbee sensor, calculate the saturated vapor pressure using the Tetens equation, derive the VPD, and toggle a humidifier to maintain optimal transpiration rates for plants.
3. Predictive Maintenance
By monitoring the power draw of appliances (via Zigbee plugs with energy monitoring), you can detect anomalies. A refrigerator compressor that runs 20% longer than the historical moving average indicates failing seals or coolant loss. Your Python script can alert you to perform maintenance before catastrophic failure occurs.
6. External Reference & Video Content
In the broader context of "Smart Home Automation" (referencing the summary of the associated video content), the visual guide often highlights the user experience—the "what" rather than the "how." The video likely demonstrates the seamless switching of lights or the aesthetic integration of sensors.
However, as engineers, we must look past the UI. The video illustrates the result of a well-architected system. The latency-free response shown in high-quality demos is rarely achieved through cloud integrations. It is achieved through local processing, similar to the Python architecture described here. The video serves as a functional specification; our Python code is the implementation detail that bridges the gap between the plastic sensor casing and the desired user experience.
7. Conclusion & Next Steps
Integrating Zigbee sensors with Python transforms a collection of gadgets into a cohesive, deterministic system. We have moved beyond simple "IF this THEN that" logic into the realm of sensor fusion, hysteresis handling, and asynchronous event processing.
Key Takeaways:
- Local is Law: Avoid cloud dependencies to minimize latency and maximize reliability.
- State Management: Always implement hysteresis and debounce logic for physical sensors.
- Asynchronous Design: Use
asyncioto handle high-throughput telemetry without blocking.
Next Steps: Start by isolating one critical system (e.g., leak detection or climate control). precise hardware selection is critical; upgrade your coordinator to a CC2652P-based device if you haven't already. Once you have mastered the Python-MQTT loop, consider integrating a time-series database to visualize the invisible physics of your home environment.